And here's the birthday boy's shirt! I got help from my FB peeps to decide the final layout of it and I couldn't be happier with the results! "Still Hungry" is my little guy's motto, it seems. From the time he could hold stuff with his chubby fingers, he's been cramming everything, and I do mean EVERYTHING edible and otherwise, into his mouth. My older two kids did not have this obsession with tasting their way through their new world like my little Noah does. It flustered and flabbergasted me until I realized this meant he was also more open to trying new foods, unlike my two other very picky eaters.
Anyway, back to the shirt! I plan to applique a number one to the back of the shirt eventually and this will be one of the keepsake shirts that'll go into his memory box. The cake slice image was taken from the same Eric Carle fabric I used for my birthday banner in the previous post. I simply fused the image onto blue felt and then sewed that onto the shirt. The felt letters, I am SO proud to say, were cut freehandedly by yours truly! Yup- I'm that good. They look so nice, don't they? I heat ironed those onto the shirt and voila- a birthday shirt that perfectly describes the birthday boy to a tee. Pun totally intended. =)
And here is the big brother's shirt. Simple- just the way he and I like it. I cut the image out and sewed a zig-zag stitch around the edges to keep it from fraying and then I fused it onto the shirt. Sew fast, huh? ;-) I got the green shirt at Walmart for $3.47. I think there were similar shirts at the craft store that were on sale for 3/$9 but their tees were too thick and I like the lighter, slightly vintage look of this shirt better.
A close-up of the stitching. I think it's the little details that make the shirt cool.
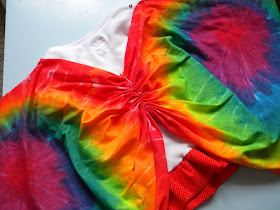
And this is a tie dye butterfly shirt for my daughter. Cool too, I think! I had her try the shirt on so I could pin where the wings need to be sewn. The tie dye fabric was an amazing find at the Goodwill. I got 2 yards for $5! I'm trying to figure out what else I can do with it because my family doesn't wear tie dye- ever.
I sewed a bright ruffle hem for the bottom of the shirt- it really needed a pop of color because the front of the shirt is so white.
And yes- that's another applique image from the awesome multi-tasking fabric I purchased.
Trying on the wings before sewing. I think I could clip the wings higher at the wrist so it won't droop so much under the arm. This is why we should try it on before we sew...a lesson I learned the hard way! You would think it'd be easy to simply sew some wings onto a shirt without a fitting but nope! Depending on the fabric (mine was knit) it'll drape differently. I did a quick stitch the first time because my daughter had been asleep so I didn't have her in it before I sewed. After I had her put it on, I realized that I needed to place the wings in an entirely different spot on the shirt! Now I know...and now so do you! =)
Here she is modeling the shirt. She learned to pose after watching my friend's daughter, Leah, pose in her pictures. Lol- my daughter is a little more awkward in her poses though- she's just too shy and doesn't have the attitude that Leah has. But I think it's so her and I can't wait to embarrass her when she's a teenager with some of the pictures I've snapped of her posing.
Oh, in case you're wondering, she LOOOOOVES her butterfly wing shirt and wore it all day with just the pins holding the wings up. Todays goal: sew them on CORRECTLY!!!! =)


No comments:
Post a Comment
Like this post? Leave a comment or check the sidebar for ways to connect with me - I'd love to hear what you think!