Saturday, March 9, 2013

DIY Refashion: Men's Tee into Peplum Tee


Now that I'm a stay at home mom, I don't quite have the clothes shopping budget that I used to have and take for granted. It's been quite the adjustment, believe me! I looooove clothes (what normal woman doesn't?) but I also like having food on the table and bills being paid on time so clothes shopping has been completely wiped off my list of to-do's.

With the long dreary winter and my new role at home, I just didn't feel the need to update my wardrobe. I live in my jammies most days anyway. The only times I needed to really "dress up" was when I went to the grocery store but sometimes, I didn't even bother matching my outfit because my long wool coat covered me from shoulders to knees. All anyone saw if they deigned to look at me were my pants and boots. And yes, I'm ashamed to admit- sometimes I even wore the jammie pants out if it was just a quick run I had to make. I used to balk at women who did that before. Now, sadly, I'm one of them!

Now that I can smell spring coming, I'm determined to clean myself up and present myself in public with some dignity since I can't wear that long coat anymore without drawing more attention than I need! So what's  a broke mama to do? Why- refashion my old stuff or cheap stuff I find at thrift stores of course! I enjoy sewing and I've made a few modest things here and there. Later, I'll share the dresses I refashioned for my daughter. Yes, sadly, I will not be buying her a ton of dresses every spring like I used to. She'll get a new one or two, but most will be made using her old ones.
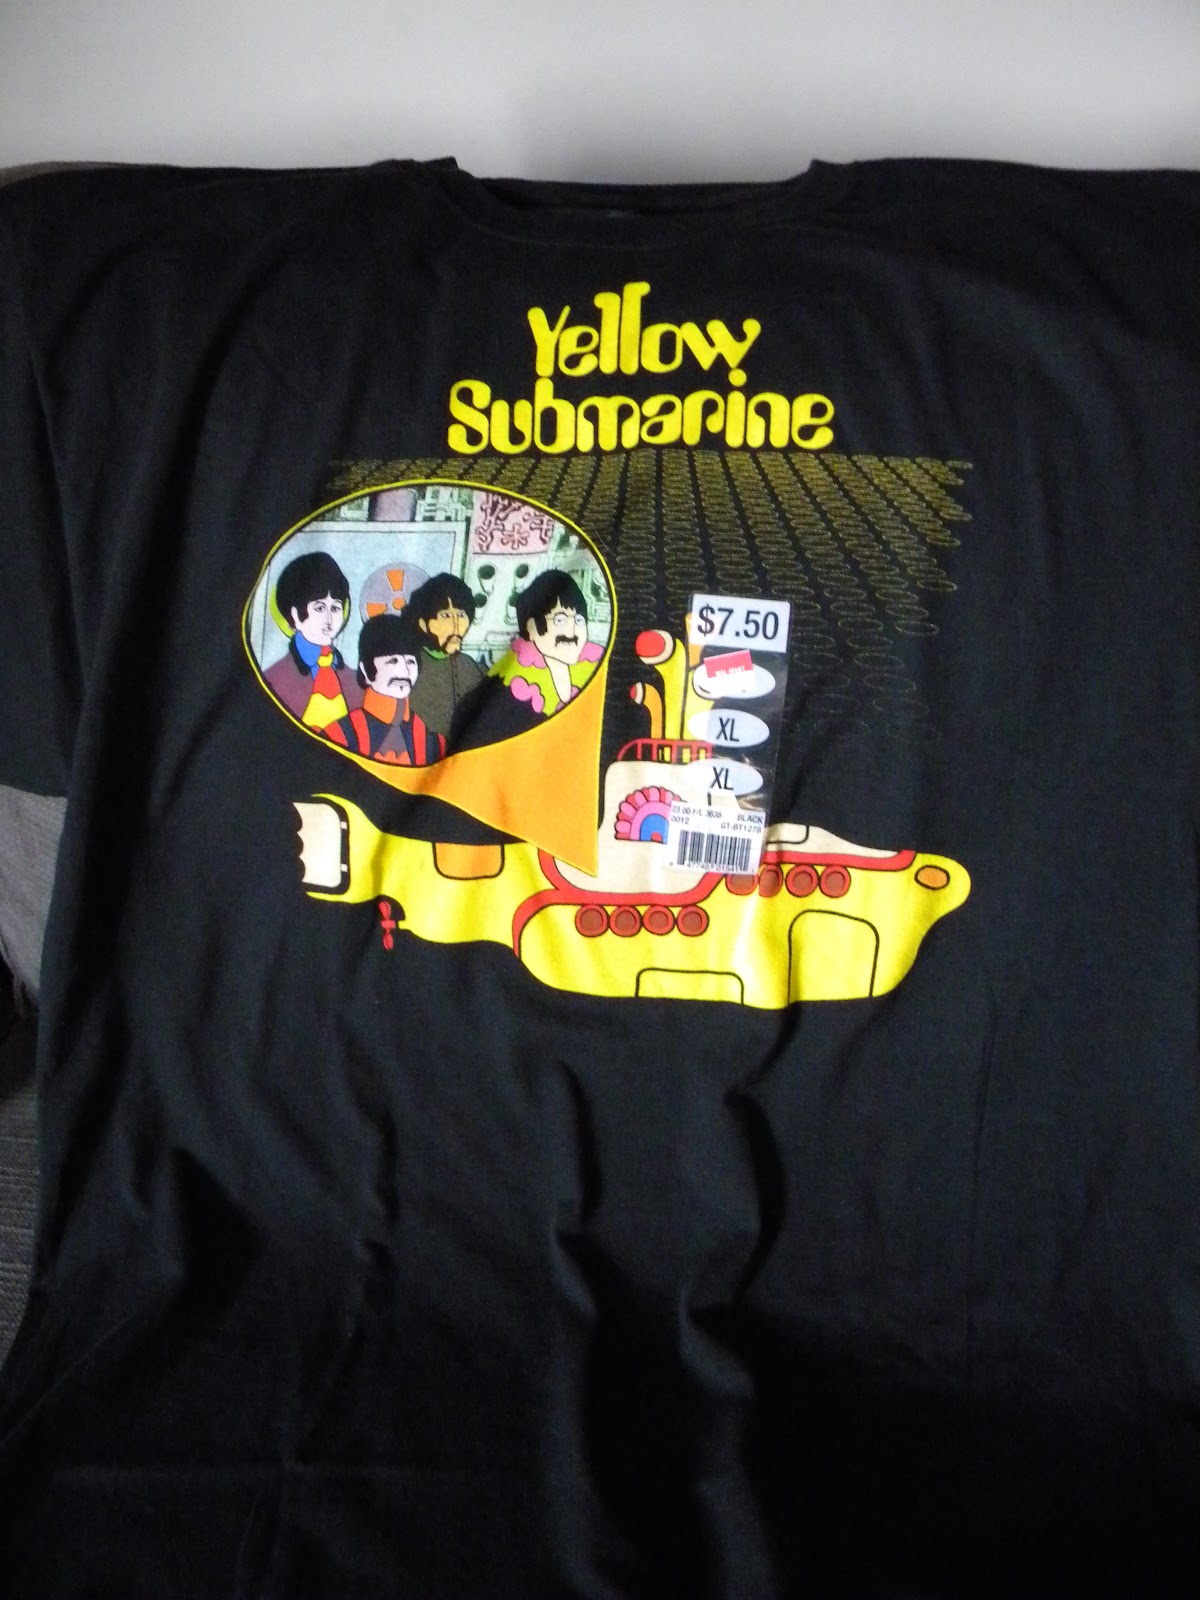
Before: a too large t-shirt.


Anyway, back to MY refashion! I'm really loving those peplum tops I've been seeing just about EVERYWHERE but I needed something more casual for everyday wear that would still look cool and fashion forward. I saw a peplum tee refashion somewhere on Pinterest and knew I'd found what I was looking for. So while I was grocery shopping at Walmart yesterday, I passed through the men's section and saw that they had a couple $5 clearance racks. I browsed through and found this awesome Beatles Yellow Submarine black tee shirt in a size large. Bingo!

A few pins here and there, some cutting, some sewing back together and voila: a cute peplum tee in my size! I love it and am looking forward to making a few more for myself and my daughter. They look great with colored skinny jeans and flats: my usual spring go-to outfit.

After: a fitted, flared, and  fashion-forward top.


And I must apologize for my dusty mirror in the "after" shot. You can tell I haven't used it all winter long, lol! It's amazing what you can do with a big tee shirt, isn't it? I'm off to make a few more refashions in different styles! Hope this inspires all you stay at home moms to start vamping up your spring wardrobes on the cheap! I'm going to really enjoy doing mine and I'll share some more of my refashions as I create them, including the stuff I made for my little girl! Happy spring sewing!

Tuesday, March 5, 2013

Very Hungry Caterpillar Birthday Shirts


And here's the birthday boy's shirt! I got help from my FB peeps to decide the final layout of it and I couldn't be happier with the results! "Still Hungry" is my little guy's motto, it seems. From the time he could hold stuff with his chubby fingers, he's been cramming everything, and I do mean EVERYTHING edible and otherwise, into his mouth. My older two kids did not have this obsession with tasting their way through their new world like my little Noah does. It flustered and flabbergasted me until I realized this meant he was also more open to trying new foods, unlike my two other very picky eaters. 

Anyway, back to the shirt! I plan to applique a number one to the back of the shirt eventually and this will be one of the keepsake shirts that'll go into his memory box. The cake slice image was taken from the same Eric Carle fabric I used for my birthday banner in the previous post. I simply fused the image onto blue felt and then sewed that onto the shirt. The felt letters, I am SO proud to say, were cut freehandedly by yours truly! Yup- I'm that good. They look so nice, don't they? I heat ironed those onto the shirt and voila- a birthday shirt that perfectly describes the birthday boy to a tee. Pun totally intended. =)


And here is the big brother's shirt. Simple- just the way he and I like it. I cut the image out and sewed a zig-zag stitch around the edges to keep it from fraying and then I fused it onto the shirt. Sew fast, huh? ;-) I got the green shirt at Walmart for $3.47. I think there were similar shirts at the craft store that were on sale for 3/$9 but their tees were too thick and I like the lighter, slightly vintage look of this shirt better. 


 A close-up of the stitching. I think it's the little details that make the shirt cool.


And this is a tie dye butterfly shirt for my daughter. Cool too, I think! I had her try the shirt on so I could pin where the wings need to be sewn. The tie dye fabric was an amazing find at the Goodwill. I got 2 yards for $5! I'm trying to figure out what else I can do with it because my family doesn't wear tie dye- ever. 


I sewed a bright ruffle hem for the bottom of the shirt- it really needed a pop of color because the front of the shirt is so white. 


And yes- that's another applique image from the awesome multi-tasking fabric I purchased. 


Trying on the wings before sewing. I think I could clip the wings higher at the wrist so it won't droop so much under the arm. This is why we should try it on before we sew...a lesson I learned the hard way! You would think it'd be easy to simply sew some wings onto a shirt without a fitting but nope! Depending on the fabric (mine was knit) it'll drape differently. I did a quick stitch the first time because my daughter had been asleep so I didn't have her in it before I sewed. After I had her put it on, I realized that I needed to place the wings in an entirely different spot on the shirt! Now I know...and now so do you! =)


Here she is modeling the shirt. She learned to pose after watching my friend's daughter, Leah, pose in her pictures. Lol- my daughter is a little more awkward in her poses though- she's just too shy and doesn't have the attitude that Leah has. But I think it's so her and I can't wait to embarrass her when she's a teenager with some of the pictures I've snapped of her posing. 
Oh, in case you're wondering, she LOOOOOVES her butterfly wing shirt and wore it all day with just the pins holding the wings up. Todays goal: sew them on CORRECTLY!!!! =)


Homemade Fabric Birthday Banner


Some more progress was made this week (finally, right?) for this much anticipated 1st birthday party at the end of March! I was able to sew up a colorful fabric banner from the Eric Carle fabric that I purchased from Treasure Bay Fabrics on Etsy. It's the birthday banner quilt panel (on sale for only $5.99/panel) and I purchased two panels to use for the banner and for the kids' birthday shirts.  


For the banners above, I used the colored fleece I had on hand. They were from the remnants bin and nearly a yard and a half each. On top of that, there was an extra 50% off all remnants that day so they came up to less than $5 each. I LOVE the remnant bin! It's the first thing I gravitate to when I walk into my fabric store. 

I used my pinking shears to cut out all the fabric, including the felt sheets that I used to back the images below. Then I simply sewed them together with a straight stitch and added eyelets to the corners so I can either string a colorful ribbon through or tie them with ribbons to a curtain rod. I haven't decided yet where I will be hanging the banner. It may be hung over the patio door or under the giant papier-mache caterpillar on the loft wall. 


Aren't the images gorgeous and colorful on the fabric? I don't know what I'll do with these once the party's over! Maybe donate them? What do people normally do with pretty party decor that won't be used again??? 


I can't wait to see all the party decor go up and the effect it will create. It's so bright, cheery and colorful- so right for a celebration!